Bread is one of the most widely consumed foods in the world, and it has been an important dietary staple for thousands of years. Whether you are a seasoned baker or a beginner, understanding the basics of bread making is essential if you want to produce a delicious and satisfying loaf. In this article, we will explore the history of bread making, the key ingredients needed to make bread, the essential equipment required, and the process of making bread from start to finish.
The History of Bread Making
The origins of bread making can be traced back to ancient civilizations such as Egypt, Greece, and Rome. These early bakers used simple techniques to create bread, such as mixing flour and water to make a dough and baking it on a hot stone. Over time, more complex methods of bread making were developed, including the use of yeast and other leavening agents to help the dough rise.
Ancient Origins of Bread
The earliest known evidence of bread making dates back to around 8000 BCE, in what is now modern-day Turkey. Archaeologists have found evidence of bread-making facilities, as well as grinding stones and ovens used to bake bread. Other ancient civilizations, such as the Egyptians, Greeks, and Romans, also had sophisticated bread-making traditions. In ancient Rome, bakers would knead the dough with their feet in large vats, creating a fermentation process that helped the bread rise.
It is interesting to note that bread was not just a staple food, but also had cultural and religious significance in many ancient societies. For example, in ancient Egypt, bread was often used as an offering to the gods, and was also used as a form of payment for workers.
The Evolution of Bread Making Techniques
Over time, bread making techniques have continued to evolve. In the Middle Ages, bakers began adding ingredients such as spices and fruits to create new and interesting flavors. The introduction of milk and butter into dough also helped to make the bread softer and more flavorful.
During the Industrial Revolution, bread making became more efficient with the invention of the bread machine. This allowed for mass production of bread, making it more accessible to people of all social classes. However, many people still preferred the taste and texture of handmade bread, leading to a resurgence in artisanal bread making in recent years.
Today, there are a wide variety of bread-making methods and recipes to choose from, ranging from simple no-knead bread to complex sourdough loaves. Many people enjoy making their own bread at home, as it allows them to control the ingredients and create a personalized flavor profile.
Understanding the Key Ingredients
There are just four main ingredients needed to make bread: flour, yeast, water, and salt. However, getting the right balance of these ingredients is essential for creating a delicious and well-textured loaf.
Flour: The Foundation of Bread
Flour is the foundation of any bread recipe. There are many different types of flour to choose from, including all-purpose flour, bread flour, and whole wheat flour. All-purpose flour is a good choice for beginners as it is easy to work with. Bread flour has a higher protein content, which helps to create a stronger dough. Whole wheat flour provides extra nutrition, but it can be more challenging to work with than white flour.
When selecting your flour, it's important to consider the type of bread you want to make. All-purpose flour is great for making basic bread, but if you want to make a more artisanal loaf, you may want to consider using bread flour. Whole wheat flour is a great option if you want to add more fiber and nutrients to your bread.
Yeast: The Leavening Agent
Yeast is what causes the bread to rise and gives it its light, airy texture. There are two main types of yeast: active dry yeast and instant yeast. Active dry yeast needs to be hydrated and activated before use, while instant yeast can be added directly to the dough. Both types of yeast are available in most grocery stores.
When using yeast, it's important to make sure it's fresh and active. If your yeast is old or inactive, your bread won't rise properly. To test your yeast, you can mix it with warm water and a pinch of sugar and wait for it to bubble and foam. If it does, your yeast is active and ready to use.
Water: The Hydrating Element
Water is what gives the dough its hydration and helps the gluten develop. The amount of water used will depend on the type of flour used and the desired texture of the bread. It is essential to use water at the appropriate temperature, as this can affect how the yeast activates and how the dough rises.
When making bread, it's important to use water that is lukewarm, around 110-115°F. Water that is too hot can kill the yeast, while water that is too cold can prevent it from activating. If you're unsure about the temperature of your water, you can use a thermometer to check.
Salt: The Flavor Enhancer
Salt is a crucial ingredient in bread making, as it helps to enhance the flavor of the bread and regulate fermentation. It also helps to control the rise of the dough and prevent excess fermentation, which can lead to a dense and heavy loaf.
When adding salt to your dough, it's important to mix it in thoroughly to ensure it's evenly distributed. You may also want to consider using a high-quality sea salt, which can add a unique flavor to your bread.
Overall, the key to making great bread is to experiment with different types of flour, yeast, water, and salt to find the perfect balance for your desired loaf. With a little practice and patience, you can create delicious homemade bread that will impress your family and friends.
Essential Bread Making Equipment
While it is possible to make bread with just a few basic tools, having the right equipment can make the process much easier and more enjoyable. Here are some essential pieces of equipment to have on hand:
Kitchen Mixer and Utensils
Bakers prefer to use a stand mixer with a dough hook attachment for easy kneading. We suggest the Bosch Universal Plus mixer for pro baker's and the NutriMill Aritste mixer for beginner baker's.
When it comes to utensils, a bench scraper is also a great tool to have on hand. It can be used to divide the dough, shape it, and clean up any excess flour or dough scraps.
Measuring Tools
Measuring cups and spoons are essential for ensuring that the correct amount of ingredients is used. It's important to note that measuring flour by weight, which can be more accurate than measuring by volume, is highly recommended. A kitchen scale can be used for this purpose.
Another useful tool to have is a water temperature thermometer. The temperature of the water used to make the dough is crucial, as it can affect the yeast's activity and the final texture of the bread. A thermometer can help ensure that the water is at the correct temperature.
Baking Sheets and Pans
A baking sheet or loaf pan is necessary for baking the bread. Loaf pans are best for sandwich bread, while baking sheets can be used to make free-form or artisan-style loaves. A baking stone or Dutch oven can also be used for baking artisan bread, as it helps to create a crispy crust.
It's important to note that the type of pan used can also affect the final texture of the bread. A dark metal pan will absorb more heat and can result in a darker crust, while a light-colored pan will reflect more heat and result in a lighter crust.
Thermometers and Timers
A thermometer can be used to check the temperature of the water and the dough, while a timer can help to ensure that the bread is baked for the appropriate amount of time. A digital thermometer is recommended, as it can provide a more accurate reading than a traditional analog thermometer.
When it comes to timers, there are many options available. A simple kitchen timer can be used, or a more advanced timer with multiple settings can be helpful for keeping track of multiple batches of bread.
Overall, having the right equipment can make the bread-making process much easier and more enjoyable. With these essential tools on hand, you'll be well on your way to baking delicious homemade bread.
Mastering the Bread Making Process
The process of making bread is both an art and a science. It involves several steps, each one crucial to achieving the perfect loaf. From mixing and kneading the dough to baking and cooling the bread, every step requires precision and attention to detail.
Mixing and Kneading the Dough
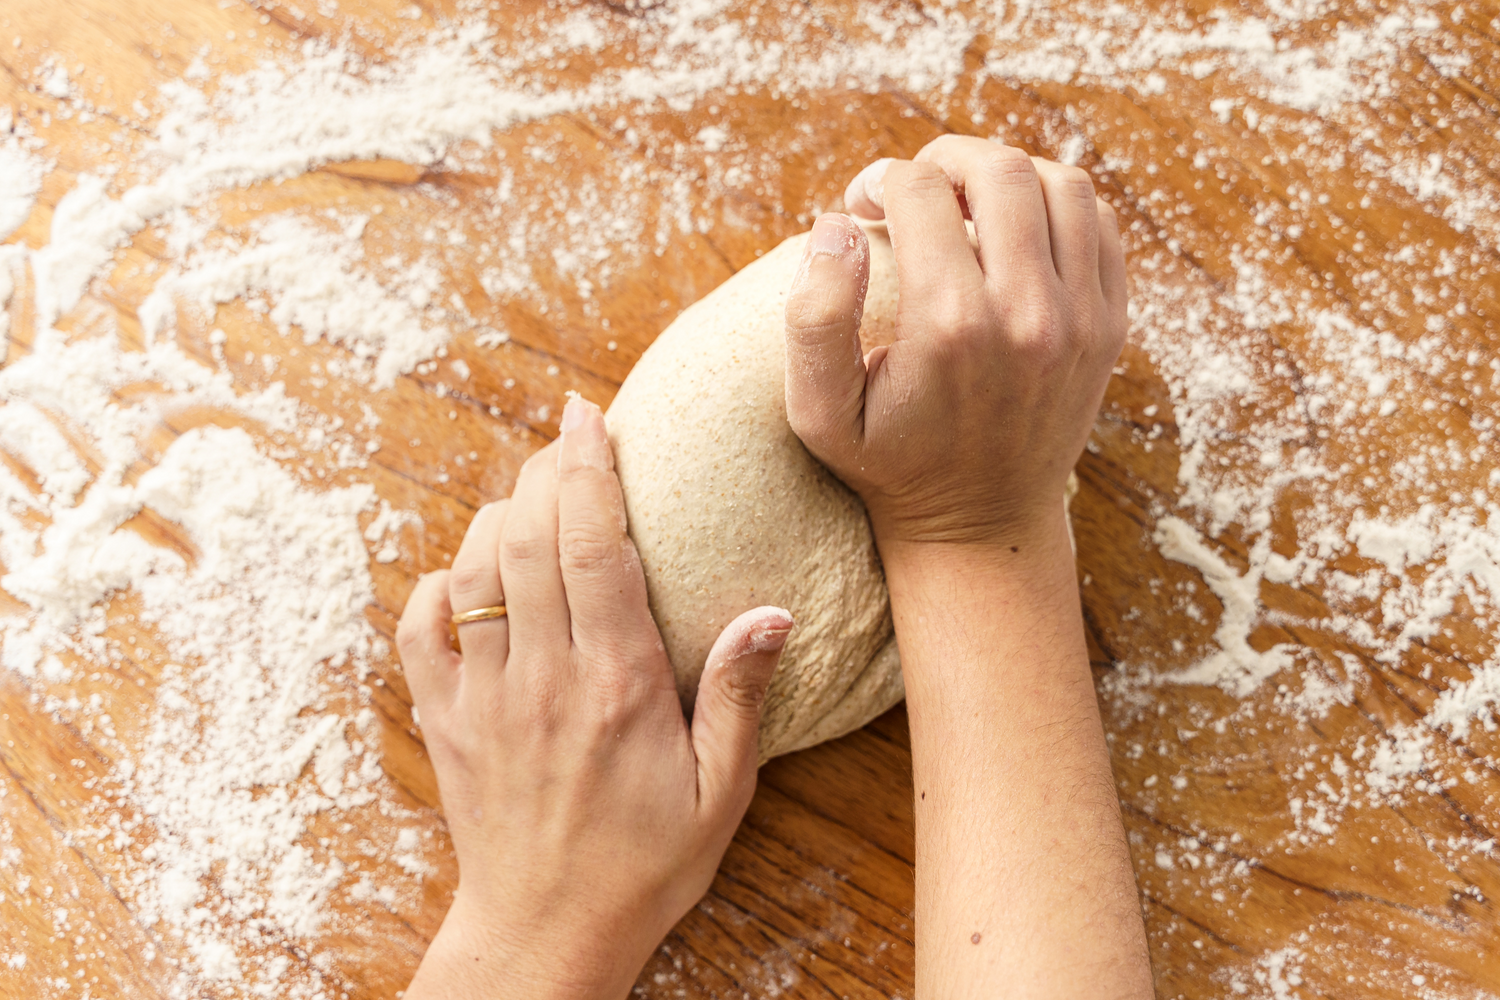
The first step in making bread is to mix the ingredients together in a large mixing bowl. This can be done by hand or with the help of a stand mixer. Once the dough has come together, it needs to be kneaded to develop the gluten. Gluten is a protein that gives bread its structure and texture. Kneading helps to align the gluten strands and create a smooth, elastic dough. This can take anywhere from five to ten minutes, depending on the recipe and the type of flour used.
When kneading the dough, it's important to use the right technique. You can either fold the dough over itself and push it away with the heel of your hand, or you can use a stretching and folding technique. This involves stretching the dough out and then folding it over itself several times. Whichever technique you choose, be sure to keep your work surface lightly floured to prevent the dough from sticking.
The Importance of Fermentation
After the dough has been kneaded, it needs to be allowed to rest and ferment. This allows the yeast to activate and the dough to rise. Fermentation also develops the flavor of the bread, giving it a slightly tangy taste. The amount of time needed for fermentation will vary depending on the recipe and the temperature of the room. Generally, the dough should double in size during this stage.
During fermentation, the dough should be covered with a damp cloth or plastic wrap to prevent it from drying out. You can also place it in a warm, draft-free spot to help speed up the process. However, be careful not to let it get too warm, as this can cause the yeast to over-activate and the bread to become too puffy.
Shaping and Proofing the Dough
Once the dough has risen, it needs to be shaped into the desired shape and allowed to proof. Proofing involves allowing the dough to rise once again before baking. This step is essential for developing a light and airy texture. To shape the dough, gently deflate it and then shape it into a ball or loaf. You can also shape it into rolls, baguettes, or other shapes depending on your preference.
Once the dough has been shaped, it needs to be placed in a proofing basket or on a baking sheet lined with parchment paper. Cover it with a damp cloth or plastic wrap and let it proof for another 30 minutes to an hour. During this time, the dough will rise again and develop its final shape.
Baking and Cooling Your Bread
Finally, the bread needs to be baked in a preheated oven for the appropriate amount of time. This can vary depending on the recipe and the type of bread you're making. Generally, bread should be baked at a high temperature for the first 10-15 minutes to help it rise and develop a crust, and then at a lower temperature for the remainder of the baking time.
Once it is done baking, it needs to be allowed to cool on a wire rack. This helps to prevent a soggy or dense texture and allows the crust to develop a nice crunch. Be sure to let it cool completely before slicing into it. This will help it retain its shape and structure.
With these tips and techniques, you'll be well on your way to mastering the art of bread making. Whether you're a seasoned baker or a beginner, there's nothing quite like the satisfaction of baking your own bread from scratch.
Conclusion
Bread making is a satisfying and rewarding process that can provide you with delicious and nutritious loaves for years to come. By understanding the basics of bread making, including the history of bread, the key ingredients needed, the essential equipment required, and the process of making bread from start to finish, you can unlock the secrets of bread making and create loaves that are both tasty and nutritious.
